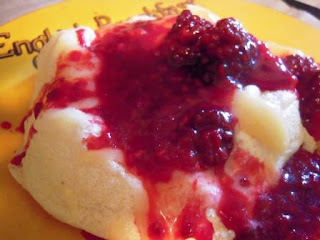
Sunday, August 1, 2010

August Challenge - Galette

Posted by - Chaya

I was down to three items for us to bake and I jumped back and forth. Just a few days ago, I mentioned to Rena, something completely different. After all this indecision, I simply, selected one, the galette and I am happy with this and hope you are, also.

I made my first and only galette for another baking group, Baking with Dorie (Not Tuesdays with Dorie). Just to clarify, Baking with Dorie is for those who could not get into Tuesdays with Dorie after it closed the membership.

Once, I made that galette, I wanted to make many more but I didn't do it. I had originally approached the galette with some concern, fearful of the crust. It turned out to be the easiest recipe with a free form crust. Honestly, it was a snap. Made it in the food processor, kind of shaped it, made the filling, filling in crust, with hands, fold over sides. It was delicious.

A galette can be used for sweet and savory and I am thinking of making a savory one, a gluten free one - at that.

So here is the French galette in its simplicity and glory. They are rustic looking. Don't win beauty contests but that to me, is the beauty of the galette. I don't have to worry about presentation other than to make it look rustic.


The recipe is from Baking From my Home to Yours by Dorie Greenspan.
My Galette - this following paragraph is from my original post when I first made the galette.

"I was wondering what the purpose of a galette is and I am going to do some research. From a practical point, it is easier and faster than a pie or tart. The look which we call rustic, is not pretty like a pie or tart, but there is something about that fruit squeezed in the middle of that dough which is unique. It was a snap to make. The hardest part was the waiting while it sat in the refrigerator. I was going to make it in the food processor but I decided to use the mixer, since hubby just brought me a very nice gift in the form of a Kitchen Aid. All my daughters and daughter-in-laws, have one so it is only fair that Grannie, over here, should also be able to play. In sum, I loved this and it was easy to make. This is a winner."

A few exceptions to the rule. I did not use Dorie's crust, below, because I refuse to keep shortening, in the house. I used David Leibowitz's. I did not make the custard. Someone, who made it before me, deemed it not necessary and it wasn't, but by all means, feel free to use it. I used cherry jelly and I subbed strawberries and blueberries which saved the work of removing skins from peaches and apricots. I think, everyone did.

I made the recipe that did intimidate me, a bit, to one that was a cinch. I plan to make another and I will get the recipe for the crust and post it here.
Dorie's recipe:

Summer Fruit Galette by Dorie Greenspan


from Baking From My Home to Yours

Good For Almost Everything Pie Dough for a single crust, chilled (pg 442)

2-3 tablespoons jam or marmalade

about 2 tablespoons graham cracker crumbs

Fresh summer fruit: about 10 apricots, 8-10 nectarines, 8 ripe but firm peaches, 8-10 firm plums or 2 stalks rhubarb

Decorating (coarse) or granulated sugar, for dusting


For the Custard

3 tablespoons unsalted butter, melted and cooled

1/3 cup sugar

1 large egg

¼ teaspoon pure vanilla extract

Confectioners’ sugar, for dusting

Getting Ready

Center rack in the oven and preheat to oven to 425 degrees F. Line a baking sheet with parchment (see below) or a silicone mat.

To make it easier to move the pie dough onto the baking sheet, roll the dough between sheets of parchment paper ( in which case, you can use one of the rolling sheets to line the baking sheet) or wax paper or plastic wrap. Alternatively work on a well-floured surface, taking care to keep the dough moving by turning it and flouring the surface often.

Roll the dough into a large 1/8 inch thick circle. Using a pastry wheel or a paring knife, time the dough to a 13 inch diameter. Using a cake pan or a pot lid as a template and the tip of a bunt kitchen knife as a marker, lightly trace a 9 inch circle in the center of the dough- this is the area for the filling.

With the back of a spoon or a small offset spatula, spread some of the jam over the circle- how much will depend of the jam flavor you want.

Sprinkle over the crumbs, adding a little more than 2 tablespoons if you think you’ve got particularly juicy fruit. Put a piece of plastic wrap or wax paper over the dough and refrigerate it while you prepare the fruit.

Wipe the apricots, nectarines or plums clean with a damp towel and cut in half; discard the pits. Blanch peaches for 10 seconds in a pot of boiling water, transfer them to a bowl of ice water to cool, then slip off the skins. Halve and pit the peaches or peel rhubarb to remove the strings, and cut into 1 to 2 inch pieces.

Arrange the fruit on the dough, cut side down if using stone fruits, then gently lift the unfilled border of dough up and onto the filling. As you lift the dough and place it on the filling, it will pleat. If you’re not in a rush, freeze the galette for 15 minutes to give the crust a rest.

Brush the dough very lightly with a little water, then sprinkle it with a teaspoon or two of sugar. Bake galette for 25 minutes, or until the crust is brown and the fruit is soft.

Meanwhile, make the custard

Whisk together the melted butter, sugar, egg and vanilla in a bowl; set aside until needed.

Remove the baking sheet from the oven (leave the oven on), and carefully pour the custard around the fruit. Depending one how much juice has accumulated and how much space you have between the fruit, you may not be able to pour all the custard into the galette, but even 2 tablespoons can give the right effect. Pour in as much custard as you can, then carefully return the pan to the oven.

Bake for another 12 to 15 minutes, or until the custard is set- it shouldn’t jiggle when you gently shake the pan. Cool the galette on the baking sheet on a rack to cool. The galette can be served when it is just warm or- my preference- when it has reached room temperature. Dust with confectioners; sugar just before serving.

Good for Almost Everything Pie Dough

For a 9 inch Single Crust

1 1/2 cups all purpose flour

2 tablespoons sugar

3/4 tsp salt

1 1/4 sticks very cold unsalted butter, cut into tbsp size pieces

2 1/2 tablespoons very cold vegetable shortening, cut into 2 pieces

About 1/4 cup ice water

Put the flour, sugar, and salt in a food processor fitted with a metal blade, pulse just to combine the ingredients. Drop in the butter and shortening and pulse only until the butter and shortening are cut into the flour. Don’t overdo the mixing- what you’re aiming for is to have some pieces the size of fat green peas and others the size of barley. Pulsing the machine on and off, gradually add about 6 tbsps of the water- add a little water and pulse once, add some more water, pulse again and keep going that way. Then use a few long pulses to get the water into the flour. If, after a dozen or so pulses, the dough doesn’t look evenly moistened or form soft curds, pulse in as much of the remaining water as necessary, or even a few drops more, to get a dough that will stick together when pinched. Big pieces of butter are fine. Scrape the dough out of the bowl and onto a work surface. Shape the dough into a disk and wrap it. Refrigerate the dough for at least 1 hour before rolling (if your ingredients were very cold and you worked quickly, though, you might be able to roll the dough immediately: the dough should be as cold as if it had just come out of the fridge).


Saturday, July 31, 2010

July Roundup & Happy Anniversary!

Have the Cake is 1 year old!
Thank you to everyone who was here for the first challenge and thank you to all our members for making this past year so much fun! I hope we have many more years of baking together!

Thanks to everyone who participated in the July challenge and to Sue for the pick! We had a bit of a heat wave in July so this pick was perfect! Anything that involves whipped cream and fresh fruit is good is my book. :)


Sweet Melissa's Pavlova

Posted by - Chaya

Thanks to Jess for being late so I don't have to be the only one. I bet she did not have a fire in her oven and have three fire trucks parked in front of her house. Really. Is that an acceptable excuse. I don't want to do - one better. That was frightening enough.

If it were not for Rina being so understanding, you would not see this recipe. I had one of those silly times where everything goes wrong and the easiest solution seems to be, to give up. I am glad that I did not.


The recipe below is from The Sweet Melissa Baking Book but I made changes. I want to leave the recipe here, untarnished by my changes. Normally, I would not share a recipe from this book but because it is not part of the group, I am going to make this exception. Also, I did find it online so for anyone who is really looking, they can locate it.


I made a quarter of the recipe which was hard to do. I made the meringue in my big mixer and I thought it was going to sit there. It looked ludicrous to see the big machine and one egg's worth of whites. With the whipped cream, I got smarter and used a hand mixer. Even that didn't work. For some reason, I could not get the beaters to stay in the mixer. Never happened before. Also, even in a small bowl, there was very little cream (1/4 cup) and it refused to change for the longest time. At the end, those stiff peaks were soft and pliant but that was the best I could do.

Sweet Melissa Pavlova Peach Melba

Ingredients:

- FOR THE MERINGUE

- 4 large egg whites
- 1 cup superfine sugar
- 1 1/2 teaspoons cornstarch
- 1 tsp white vinegar, (I used champagne vinegar)
- 1/4 teaspoon vanilla
- FOR THE MELBA

- 2 to 3 large peaches
- 1 pint fresh raspberries
- 1 recipe raspberry sauce, see notes

- FOR THE WHIPPED CREAM

- 1 cup heavy cream, very cold
- 1 teaspoon vanilla
- 1 Tablespoon sugar


METHOD:

Before you start::

Position a rack in the center of your oven. Preheat the oven to 250 degrees. Line a baking sheet with parchment paper. Draw a 7″ circle on the paper with a pen. Flip over the paper. You will be able to see the line. (I did not draw a line and for my mini pavlova, the circle was between three and four inches.

To make the meringue:

1. In a clean, grease-free bowl of an electric mixer fitted with the whip attachment, beat the egg whites on medium-high heat until they hold firm peaks, about 1 minute. Start adding the sugar, little by little, until the meringue holds very stiff glossy peaks, about 2 minutes. You should not feel any sugar grains at this point. If you do, keep beating.


2. Remove the bowl from the mixer. Sift the cornstarch over the meringue, and sprinkle the vanilla and vinegar on top. Using a rubber spatula, gently fold the ingredients into the meringue until just fully incorporated (the goal is to do so without deflating the meringue.)


3. Gently mound the meringue in the center of the circle on the prepared parchment paper, and smooth the edges. Bake for 1 hour and 25 minutes. Turn off the oven, and allow the meringue to cool completely in the oven for an additional hour or more. The meringue may crack as it cools – this is normal. When cool, carefully peel the paper from the bottom of the meringue and place the meringue on a serving platter. The meringue can be made only on the day of serving.

To prepare the fruit:

Peel, pit, and slices the peaches into a large bowl. Place the raspberries on top of the peaches. Pour over 1/2 cup of the raspberry sauce. Using a rubber spatula, gently combine.


To make the whipped cream:

In the bowl of an electric mixer fitted with the whipping attachment, beat the heavy cream and vanilla on medium speed. In a slow, steady stream, add the sugar beating until the mixture forms medium-stiff peaks.

To Complete the Pavlova:


1. Mound the whipped cream in the center of the meringue and spread it just up to the edges.

2. Pile the fruit and any sauce left in the bottom of the bowl on top of the cream.


3. Drizzle a little of the remaining sauce over the fruit, and serve the rest of the sauce on the side. Using a large spoon, serve immediately.


NOTES:

To make raspberry sauce: combine two 12 ounce packages of frozen raspberries, 3/4 plus 2 TBS. sugar, and 1 TBS fresh lemon juice in a medium saucepan. Bring to a simmer for 2 minutes. Let cool and strain through a fine mesh sieve. Chill for up to 5 days.


SOURCE: Sweet Melissa Baking Book


A day late Pavlova

Posted by - Jess
Nothing like the last minute! I made the pavlova yesterday...I waited mostly because I was nervous about dealing with egg whites. I decided to make this recipe for the pavlova itself but liked the idea of adding more flavor to the filling so did the pastry cream recipe posted here along with the fruit sauce.
I was unable to remove the pavlova from the parchment pan without destroying it so it was served on the baking sheet. If I made this again I am not sure how I would get around the sticking. But regardless it tasted really good and was very interesting to make.
The layers on the pavlova are pastry cream filling, blueberry sauce, whipped cream and fresh blueberries.

Last Minute Pavlova!


I was quite intimidated by this challenge and the humidity we have had all month has been an great excuse to put it off (and gain tips from my fellow bakers on what not to do and what to look out for)! So on the last day of the month I decided I had to put aside my fears and get baking.
The recipe I chose was from Simply Recipes. It uses the smaller individual pavlovas which I thought would work better.
I started by separating the eggs which was no easy task. As I learned from Rena, even a small amount of yolk would ruin everything so after getting three done perfectly, I slipped and dropped an entire egg in the whites. I tried to fish out the yolk whole but a little dribbled in so, sigh, I started over again. This time I smartened up and did one egg at a time in a different dish and then poured the whites in the mixing bowl when they were perfectly yolk free. I ruined only one more egg this way (and my dog has lots of yolks for dinner the next few nights). So egg whites and salt in the mixer and begin whisking (oh how I <3 my Kitchen Aid mixer)! I then gradually added the sugar and cornstarch. I used Splenda No Calorie Sweetener (NOT the Splenda for baking-that stuff is nasty) instead of regular sugar. After that had mixed a couple minutes I poured in the vanilla and distilled white vinegar, turned the mixer to high and left it going for about five minutes and did all the dishes.
Once it was nice and formed with stiff peaks, I spooned 8 large dollops of the meringue on a lined cookie sheet and put it in the oven. After about a half hour, they started to look a little beige so I did as the recipe said and lowered the temperature and turned the pan around.
I decided to do a fruit topping of blackberries and raspberries, heating them with some sugar until they broke up. I forgot to buy heavy cream for whip so I made up a little glaze for it as well using lemon curd, lemon juice, honey, vanilla and a little water. I just whipped it up until it was a nice thick but creamy substance.
Perfection! A delicious, light dessert!

Posted by -colleen

Friday, July 30, 2010

Almond Pavlova with Fresh Fruit and Berry Grand Manier Sauce

Posted by - Louise


It's 10:00 p.m. and I'm beat.  It was a long day at the fair, some days just feel longer than others.  It didn't help that I ate "fair food", which made me feel like I was in a coma for the late part of the afternoon.  Friday is $ 1.00 food tastings, so we make out way out into the fair to have small bites of craziness.  I had a bite of...deep fried Oreo cookie, Pink's hot dog, Tasty Chips, and a cinnamon roll.  You can see now why I ran out of energy by 3:00 in the afternoon.  On stage today we had "Harry's Deli", they were no ordinary sandwich shop.  Harry made me a prime cut steak sandwich with house made mayo, chimichurri, and grilled onions- it was the best sandwich I've eaten in ... well can't remember when.  Definitely going to make my way out there to try the rest of their deli delights.  Other than the drunk guy who trashed my stage last night and tore off my oven door, in an apron no less- today was a good day. 


I recently received a comment on the blog from someone who I noticed had more than one blog herself- interesting I thought, so I clicked away.  So excited to find "Have the Cake", a blogging community of cooks who choose one recipe a month and everyone posts their creative version of ... this month ~Pavlova.  I had to laugh because not only was I interested in joining, but  my demonstrations for the fair today were already planned to be Almond Pavlova.  I agreed with myself it was clearly a sign that I should join.  Since today is the last day of the month I had to - wanted to post before the day was over.  So it's now 10:27 p.m. here I sit writing about this crispy,crackly, gooey,  and oh so sweet dessert we call - Pavlova.  Most recipes call for superfine sugar, but I always have used regular sugar with no problems at all.  The almond extract adds another dimension of flavor and the berry sauce is... good on anything.  I had leftover churro (last post) ganache that I filled each Pavlova nest with as an added surprise under the berries and used fresh gooseberries  to add a nice sour tartness to the mix.  So there ... I did it, my first post for "Have the Cake"...


4 Egg Whites
Pinch of Salt
1 Cup granulated sugar
2 Teaspoons cornstarch
1 Teaspoon white vinegar
1 Teaspoon vanilla extract
1 Teaspoon almond extract
1/4 Cup sliced toasted almonds
2 Cups of fresh berries

Preheat oven to 300 degrees
Add egg whites and a pinch of salt to the bowl of a standing mixer with a whisk attachment
Mix on low until small bubbles begin to form
Turn mixer to high and whisk until soft peaks form
Slowly add in sugar- raining the sugar onto the meringue with the mixer running
Continue whisking until shiny and stiff peaks develop
Add in cornstarch, vinegar, vanilla, and almond extract
With a spatula gently fill a large pastry bag with a star tip
Line a baking sheet with parchment and pipe out 4-5 inch rounds about 2 inches high
Sprinkle with almonds
Place pavlova into oven  and reduce heat to 250 degrees- bake for 1 hour- turn off oven and allow to cool   for an additional hour
Store in an airtight container

2 Cups mixed frozen berries (raspberry, strawberry,blueberry)
Pinch of salt
1 Tablespoon berry fruit spread or preserves
2 Tablespoons honey or agave syrup
Zest of 1 Orange
1 Tablespoon Grand Manier

In a small sauce pot bring berries, salt, fruit spread/preserves, honey, and orange zest to a low simmer
Remove from heat and blend until smooth with a hand held emulsion blender or standing blender
Run blended sauce through a fine mesh strainer
Stir in Grand Manier
Assemble by filling pavlova with fresh fruit and topping with berry sauce

Monday, July 26, 2010

A Tale of Two Pavlovas

Posted by - Rena

I was very excited to make a pavlova. I love meringue cookies, lemon meringue pie and baked alaska. I haven't had the pie or baked alaska in many years but I have made meringue cookies in the past two. I was expecting the pavlova to be totally crunchy on the outside and chewy on the inside like the cookies.

I made the first pavlova with the challenge recipe. It seemed easy enough but I made a fatal error. While separating the eggs, I got a little splash of yolk in the whites. I figured it was a small enough amount that I didn't have to worry. Turns out that's what can ruin the whole thing. After baking for an hour and 15 minutes, the outside was very brown and the inside was spongy but not in a good way. It all looked wrong. I decided to scrap it and start over. My dog was very pleased with this outcome because she will get eggs yolks with her dinner for the next few days.

I was very careful with the second one. It baked for an hour & 15 minutes and looked perfect when it came out. The top cracked a little which put me at ease. It all looked right. I sealed it in foil and left it out overnight. My friend came over for lunch so I whipped up some cream and pasted it on like spackle. That was the best part. I topped it with strawberries, raspberries and blueberries.

So, when we cut into it I was surprised to find it very spongy. Again, I was expecting it to be somewhat chewy so my egg/salmonella paranoia kicked in and I starting fearing for our lives. I think it was perfect but I have such issues with eggs that I'm sure my neurosis made it less appetizing for my guest. We ate all the crunchy bits around the sides and then proceeded to wipe the top clean from any trace of whipped cream and fruit.

I think the problem was that I didn't know what to expect. I had a vision in my head of what it was supposed to be and then when it didn't turn out that way, I immediately started second guessing it. All in all, it was delicious!

Sunday, July 25, 2010

Berries Pavlova

Posted by -Shri


 Followed Sue's recipe;  used individual portions and Dawn's post was  really helpful.
This was a first and turned out to be  the new family favourite! Have used black berries, raspberries and blueberries in the recipe. Also used a little bit of orange zest in the whipped cream topping.

Saturday, July 24, 2010

Chocolate Pavlova

Posted by - Michele at Alwayz Bakin'


The recipe I chose for this month's Pavlova Challenge was Chocolate Pavlova by Martha Stewart. I was pleasantly surprised by this recipe. It was EXCELLENT!!!!

It was fairly easy to put together, however, I did not follow Martha's recipe for the chocolate cream. I made an adaption of my own by adding the chocolate to my own whipped cream. It didn't turn out as planned, but was delicious anyway. I think next time I will take the time to make her's.

So far everyone's Pavlova's look beautiful! If you would like to try mine, you can find the recipe
here at Martha Stewart's site.

Monday, July 19, 2010

Elegant Berry Pavlovas

Posted by -Angela from Soap Mom's Kitchen


I have never made a Pavlova and I found this traditional recipe from the The Culinary Institute of America featured on Epicurious.  It is filled with a luscious filling of mixed French Pastry Cream and Whip Cream.  I used berries because I just love them, but the original recipe suggested mixed berries, kiwi and mangoes. 

It is quite lovely in presentation.  I would definitely serve this at an elegant dinner party.  What I love most is that you can actually make all the components in advance, and just put together last minute. 


For meringues:

3 egg whites
3/4 cup plus 2 tablespoons sugar
1/2 teaspoon cornstarch


For filling:

1 1/2 cups pastry cream
1/2 cup heavy cream (Whipped)

Pastry Cream Recipe (Recipe Follows)
2 1/4 cups whole milk

6 large egg yolks
2/3 cup sugar
1/3 cup cornstarch
1 vanilla bean, split lengthwise

In medium bowl, whisk together 1/2 cup milk, egg yolks, 1/3 cup sugar, and cornstarch.

Transfer remaining 1 3/4 cups milk to heavy medium saucepan. Scrape in seeds from vanilla bean; add pod. Sprinkle remaining 1/3 cup sugar over, letting sugar sink undisturbed to bottom. Set pan over moderate heat and bring to simmer without stirring.

Whisk hot milk mixture, then gradually whisk into egg yolk mixture. Return to saucepan over moderate heat and cook, whisking constantly, until pastry cream simmers and thickens, about 1 minute. Remove from heat, discard vanilla pod, and whisk cream until smooth. Transfer to bowl and press plastic wrap directly onto surface. Chill until cold, about 4 hours. (Pastry cream can be made ahead and refrigerated, wrapped well with plastic wrap on surface, up to 3 days.)

To serve:
3 to 4 cups assorted seasonal fruit 2 cups raspberry sauce

Make meringues:

Preheat oven to 150°F. Line 2 large baking sheets with parchment paper. Using 3-inch-diameter bowl or ring mold as guide, trace 5 circles on each sheet. Turn paper over so markings are on bottom. In large metal bowl, whisk egg whites until frothy. Gradually whisk in sugar, then cornstarch. Attach candy thermometer to bowl and set over saucepan of simmering water. Continue whisking until thermometer registers 130°F. Remove bowl from heat and, using electric mixer, beat mixture at moderately high speed until mixture cools and holds stiff peaks, 5 to 7 minutes. Transfer to pastry bag fitted with large star tip.

Starting at center and working in spiral outward, pipe meringue onto 1 traced circle. Pipe second layer in ring around edge to form outer wall. Fill remaining circles in same manner.

Bake meringues until dry on outside but still soft inside, about 3 hours. Transfer pan to rack and cool 5 minutes. Peel meringues from parchment and cool completely on rack. (Meringues can be made ahead and stored in airtight container in dry, cool place up to 2 weeks or frozen in airtight container up to 3 months.)

Make filling:
Using electric mixer, beat cream until stiff peaks form.

In large bowl, whisk pastry cream until smooth. Whisk in 1/3 of whipped cream to lighten, then fold in remaining whipped cream.

Raspberry Sauce

3 1/3 cups fresh or frozen raspberries

2 cups powdered sugar
1 tablespoon lemon juice

In medium saucepan over moderate heat, stir together raspberries, powdered sugar, and lemon juice. Heat, stirring often, until raspberries begin to release juice. Raise heat to moderately high and simmer, stirring occasionally, until slightly thickened, about 1 minute. Strain through fine-mesh sieve, pressing on solids to extract all liquid. (Sauce can be made ahead and refrigerated, covered, up to 1 week.)


Assemble and serve:

Transfer each meringue to serving plate and fill with 3 tablespoons pastry cream mixture. Mound fruit on top of cream. Spoon raspberry sauce alongside on plate, and serve immediately.