Monday, August 15, 2011

Kit(ty) Kat Bars

Posted by - Nancy

Let's kick this off. I know I posted that I was going to make Twix bars for this months challenge, however my little birthday boy wanted some Kitty Kat bars. Didja get that? KitTY Kats!

After a quick search I found that pretty much all the recipes Google comes up with are the exact same. So, here is the basic recipe for homemade Kit Kat from Serious Eats:

75 Club Crackers
2 sticks of butter
2 cups of graham cracker crumbs
1 cup firmly packed dark brown sugar
1/2 cup milk
1/3 cup granulated sugar
2/3 cup creamy peanut butter
1/2 cup semisweet chocolate chips
1/2 cup butterscotch chips

Procedure:
Lay 25 crackers in a 9x13 pan. Melt butter in a saucepan and stir in graham cracker crumbs, sugars, and milk. Bring to a boil and boil for 5 minutes while stirring constantly. Remove pan from heat. Pour half of butter mixture over crackers in pan. Smooth surface with spatula. Arrange another layer of Club crackers over butter mixture. Pour remaining butter mixture over surface. Smooth surface with spatula. Arrange a third layer of crackers over top. Combine peanut butter, chocolate chips, and butterscotch chips in small saucepan. Melt over medium-low heat, stirring constantly. Spread evenly over crackers. Cool to room temperature, then cover and refrigerate two hours. Cut into 2-inch bars. Bars will keep for two weeks, stored in an airtight container in the refrigerator.

Okay, so for the first time ever I had all of the ingredients on hand for this. I was excited to get them made. But alas, I have two children, neither of whom sleeps at the same time (except for at night), and since my son is my sous chef if I bake during the day, and this recipe is all on the stove, I had to wait for after bed time to make these.

So Friday night I set out to whip these up. I assembled all of the ingredients and realized I had run out of milk. All I had was one Horizon chocolate milk box (although sitting here now I remembered I have some packages of powdered milk in the back of my pantry). Anyway, I figured Kit Kats are chocolatey and you put chocolate on top of them, so I went for it.


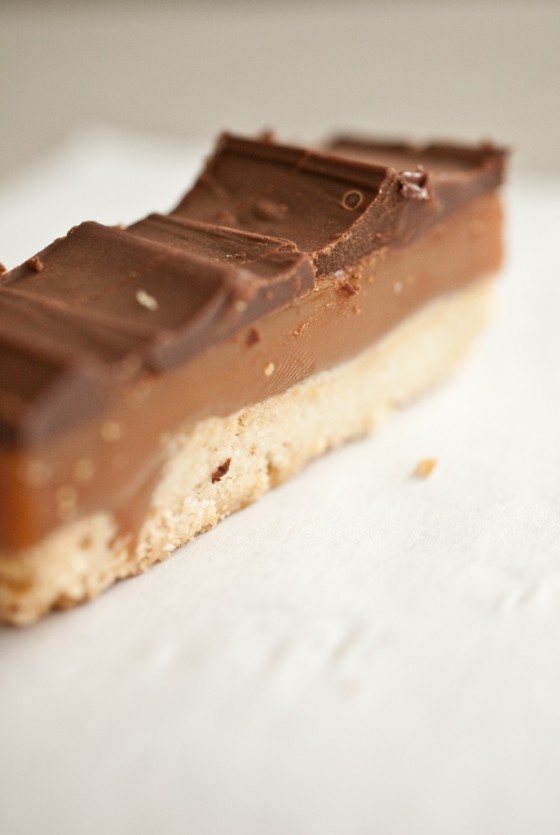
And the final product


And they taste......okay. Not spectacular, and honestly, if I were to close my eyes and try them, I would have trouble placing them as Kit Kats. First, the crackers get a bit soggy so they lack that crisp crunch. Second, the butterscotch chips throw the flavor off. And third, the graham cracker crumbs kind of overwhelm the whole thing. I also would hesitate to make these again because it makes a huge pan.

Oh, and my picky eater wouldn't eat them because they weren't real "kitty kat" bars. Oh well.

Monday, August 1, 2011

August Challenge: Homemade Candy Bars

Posted by -Nancy

Good morning and happy August! I hope it's not too hot where you are, unlike here in Texas where it's a balmy 105 most days. :P
So why not beat the heat with a delicious candy bar? Okay, so maybe it won't beat the heat, but it's still a lot of fun to make!

What!? Make a candy bar?

Yep. This month's challenge is homemade candy bars!

How about a delicious Snickers Bar?


Or a yummy Kit Kat?


Try a Milky Way


Or a Twix


As you can see, there are a lot of choices out there. These are just a sampling of what I found. So search for your favorite and get baking!

We will be making Twix bars since my little man is turning 3 this month and they are his favorite!

Sunday, July 31, 2011

July Roundup

Crackers!

July turned out to be one HOT month! Here in New York, we were over 100 degrees as was the rest of the country. I didn't turn my oven on the whole month.

Thanks to Dorrie, Colleen & Michele for your crackers! I'm glad they came out well. They look delicious.

Nancy is jumping in for the next challenge. I'm so excited about this one!


Cheese Crackers


Posted by - colleen

I finally made my crackers! I found this recipe on MyRecipes. They were delicious! I made a few tweaks-I used a Mexican 4-cheese blend instead of cheddar jack. I used whole wheat flour and Splenda sugar. The dough was not easy to roll out but I decided to just roll it the best I could and then used the pizza cutter to separate them. The shapes were not perfect but the taste made up for it. These would be perfect to bake up with some homemade soup for dinner over the winter. They were a little spicy with the red pepper and just the right amount of cheese. I would totally make these again!

Thursday, July 14, 2011

Easy Cheesy Crackers

Posted by - Dorrie

This week, while contemplating what to bring to a play group get together for snack, I remembered that this month's Have the Cake challenge is crackers. Why not kill two birds with one stone?

I searched the internet for a recipe for cheddar cheese crackers and happened upon one that was on several different websites/blogs. It sounded magnificently easy and tasty.

Fortunately for me, I already had my camera in the kitchen because that morning I had mistakenly let Henry try eating yogurt out of a bowl with a spoon. As you can see, very little made it actually into his mouth, but I think he's learning about the whole "spoon" thing...

Henry and the strawberry yogurt

Cheddar Cheese Crackers

1 cup all-purpose flour

3/4 tsp salt

1/2 tsp white ground pepper (optional)

4 Tblsp. cold unsalted butter, cut into small pieces

8 ounces grated cheddar cheese

3-4 tsp water

Pulse the flour, salt and pepper, then add butter and pulse until the mixture resembles coarse meal. Add grated cheese a little at a time until the mixture again resembles coarse meal.

Cracker dough in the food processor

Pulse in 3 to 4 tablespoons of water, one tablespoon at a time, and only enough so that the dough forms a ball and rides the blade.

Remove, wrap in plastic, and chill in the refrigerator for 20 minutes or up to 24 hours. Roll the dough out to 1/8th-inch thickness directly onto a baking sheet. I used biscuit cutters to cut out mine, but the recipe recommends using a knife or pizza cutter to cut all of the dough into 1 inch squares.

Cutting out the crackers

Bake at 350 degrees for 15-20 minutes or until the crackers are golden brown.

Finished crackers
Finished crackers

I doubled the recipe thinking that it wouldn't make very many from one batch, but as it turns out maybe 60 crackers was a bit much...

These were great crackers, right out of the oven. But they became pretty moist and "biscuity" the next day. The lack of our usual dry Colorado weather has something to do with that I think, as we are current in our "monsoon weeks" with a thunderstorm occurring every afternoon. They might store better next time, but I think if I make these again I might take the time to bake them the day that I serve them.

Monday, July 11, 2011

Blue Cheese Almond Wafers


Posted by - Michele


This month’s Have the Cake challenge was cheese crackers. Alot of people like Cheez Its. I am not one of those people. Well, I don’t really dislike them, but I don’t go crazy over them. I decided to go with this recipe made with blue cheese because I knew I had to like them! I found it in Southern Living All-Time Favorite Recipes.

This recipe would go great with a nice soup or stew, or really just a snack. The original title of the recipe was Blue Cheese-Walnut Wafers, but I don’t like walnuts. I decided to use slivered almonds instead. It was so easy to make. And I’m sure you could incorporate any cheese you wanted to. Thank you, Rena, for choosing this yummy challenge! Here is my recipe if you would like to try it!

Blue Cheese Almond Wafers

1 (4oz) package blue cheese, softened

1/2 cup butter, softened

1 1/4 cups all purpose flour

1/3 cup finely chopped almonds

1. Process first 3 ingredients in a food processor until smooth, stopping to scrape down sides. (Mixture will be sticky) Spoon mixture into a bowl; stir in almonds. Cover and chill 5 minutes.

2. Divide dough in half. Shape each portion into an 8-inch log. Wrap in heavy-duty plastic wrap; chill 1 hour.

3. Slice dough into 1/4-inch thick slices; place on ungreased baking sheets.

4. Bake at 350 for 12 minutes or until lightly browned. Store in an airtight container up to 1 week.

Friday, July 1, 2011

July Challenge: Cheese Crackers

Cheese crackers are my weakness. I can sit and eat an entire box of cheez-its or better cheddars without an ounce of guilt. Ok, that part about the guilt is not true. As we all know, a box of crackers from the supermarket can't be all that healthy. I searched around and found a great post on The Kitchn with an easy recipe. If you can't have cheese or don't like cheese, feel free to make another kind of cracker.

Now get crackerin'!
Oh god, that was so cheesy. :)

Thursday, June 30, 2011

Changes at Have the Cake

Gorgeous Boston Cream pies, cakes and cupcakes this month! My mouth is watering from all the yummy goodness.

Have the Cake is almost 2 years old! We have had many members throughout those two years and some original members are still hanging on. I'm thrilled that everyone is enjoying our challenges and are inspired to bake and create! For now, I will be taking over the challenges. If you have been anxiously awaiting your turn, please let me know and I will gladly give you a month. If there is something you have been itching to try and you've already had a turn, I'd be happy to give you another.

Thank you for participating and keeping our baking group alive and kicking!
New challenge coming tomorrow.


Egg Free Boston Cream Pie

Posted by - Nancy

So after 5 months with the new baby and my rapidly approaching 3 years old and now potty trained preschooler, I feel like I am finally getting back to groove of getting stuff done. Now if I only could type one handed a bit faster!

Anyway, I was excited about this months challenge, I have never made Boston Cream pie before. However, as I started looking for recipes I quickly realized I would need to make a variation since my baby girl is showing the signs of having the egg allergy my son has. So I am on an egg free diet to help keep her eczema at bay. But of course, BCP is full of eggs, from the cake to the luscious cream filling. I thought I would be doomed.

However, after a quick Google search I came across a vegan recipe from this blog and after reading through it I figured it would work. I am not vegan though so I did use real milk, butter and yogurt. Below are my modifications:

INGREDIENTS:

Dry:
2 c. flour
1 t. baking powder
1 t. baking soda
1/2 t. salt

Wet:
1 1/4 c. sugar
1/2 c. oil
1/2 c or 6 oz. greek yogurt
2 t. vanilla
1 1/2 c. milk

Cream filling:
1/3 c. sugar
pinch of salt
2 T. cornstarch
1 1/2 c. milk
1 T. butter
1 t. vanilla

Chocolate Ganache:
1/4 c. or 1/2 stick butter
1/3 c. chocolate chips
1/4 c. milk, at room temperature

DIRECTIONS

Preheat oven to 350 degrees F. Grease and flour two 9-inch cake rounds and line bottoms with parchment paper.

In a large bowl, combine sugar and vegetable oil. Add soy yogurt and vanilla and mix until creamy. Mix in milk. In another bowl, sift together dry ingredients. Add to wet in batches. Ladle batter between the two cake pans and bake for 20-25 minutes, or until toothpick comes out clean. Let cool on rack.

While cakes are cooling, prepare cream filling. In a saucepan, combine sugar, salt and cornstarch. Add milk and whisk together. Bring the mixture to a light boil over medium heat while whisking constantly. Lower to a simmer and whisk until thickened, about 5 minutes. Remove from heat and add margarine and vanilla. Pour into a bowl and let cool, stirring every few minutes. Filling will continue to thicken as it cools.

After cream filling is cooled, prepare ganache. In a small sauce pan over medium-low heat, melt the margarine completely, stirring constantly. Add milk and whisk to combine. Remove from heat and add the chocolate chips, stirring rapidly to melt. Let cool for several minutes.

Spread cream filling between cake layers. Top cake with Chocolate Ganache. Let cake set in fridge for at least 45 minutes. Remove from fridge 20 minutes before serving to let ganache soften for easier cutting...


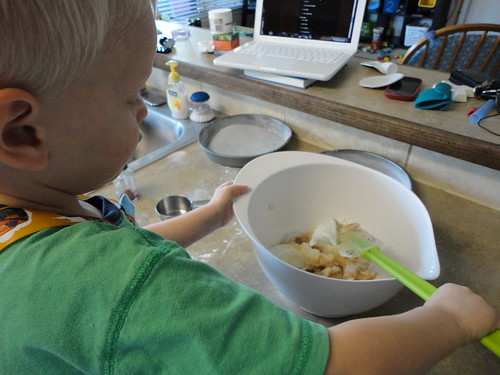
So we set out to make the cake one morning during nap time. Of course, behind every aspiring home chef is an even better sous chef:
DSC02677
DSC02681

And the final product:
Boston Cream Pie
Boston Cream Pie

And I bet you're wondering how it tastes? Pretty good actually. Don't get me wrong, this is no substitute for the luscious cream filling portion, but the cake is wonderful. In fact I think I will save the cake recipe for my daughters first birthday cupcakes!

Wednesday, June 29, 2011

Boston Cream Pie (Cake, whatever)


Posted by -colleen
This month's recipe challenge could not have been more perfect! First, I've never made a Boston Cream Pie before and that is the point of Have the Cake (to try more recipes)! Second, I have a dinner party on the 29th and need to bring dessert. Third, the dinner party hostess has an all-time favorite dessert and it is-Boston Cream Pie. Last, I got these very pretty measuring cups from Anthropologie for my birthday and I got to put them all to use.
I used the recipe for the cake and custard filling from grouprecipes.com but I used a glaze recipe from allrecipes.com (because it involved using more chocolate and well, it involved using more chocolate).
The whole thing was easier than I thought it would be. The only "problem" I had was that it was super humid outside and baking is just not as fun when you're sweating. I made the cake first and while it was baking (it took exactly 20 minutes) I got the custard completed. I left the cakes and custard cooling for about an hour and then assembled before putting the chocolate on the stove to melt. It made a nice, thick but still pourable frosting that covered the cake perfectly and dribbled just a bit over the edges. I then wrapped the poor thing in a TON of plastic wrap and put it in the fridge hoping it would stay nice and fresh for the dinner.
Then, I just had to wait and see how it was received...
The conclusion was...the custard was perfection. The chocolate top was divine. The cake was...good. A few people thought the texture was excellent. Personally, I would have liked it a little more moist. I would make this again and just try a slightly different version of the cake.
Yum!