Showing posts with label september. Show all posts

Saturday, September 1, 2012

September Challenge: Cheesecake

Posted by - Rena

I almost forgot what day it is! I can't believe it's already September 1st! Time is flying by.


Our challenge this month is cheesecake. I'm shocked we haven't tackled this one before. I saw a photo on Pinterest this week which sparked my interest in trying to make cheesecake from scratch.

We used to live near an Italian diner when I was little. My mom loved Italian style cheesecake while I was a NY cheesecake kind of gal. Curious to see what your favorites are. I just bought a canister of matcha powder so I think there is a green tea cheesecake in my future.

Happy Baking!

photo from MarthaStewart.com

Friday, September 30, 2011

September Roundup

Thanks to everyone that participated in this challenge. I think we successfully ushered in fall in NY. Hope it has arrived where you are! Looking forward to next month's challenge. Colleen is stepping in to pick our dessert.


Monday, September 26, 2011

Chocolate Coffee Icebox Cake

Posted by - Kyleen.

Hi, I'm Kyleen, from sixteenbeans. and I'm so excited to join this month's Have the Cake Challenge! It seems that I joined at a perfect time, since I've had my eye on this icebox cake for a while.

*          *          *

Whipped cream is a saving grace. It can be used to make rich, creamy sauces, or replace a failed ganache, or to revive stale cake. In this month’s Have the Cake challenge, icebox cakes took center stage, with whipped cream as the star of the show. As much as I like cookies, whipped cream is definitely the best part of this Chocolate Coffee Icebox Cake.


Coffee and chocolate are such a natural combination that I had to add some coffee flavour in the chocolate cookies as well as the cream. The dark notes of coffee bring out the rich hues in chocolate, complimenting them oh so subtly. I used decaf instant coffee powder in this recipe, although in retrospect, I probably could have replaced some of the milk with coffee or espresso.


The cookies themselves are almost too delicious to be made into a cake. As soon as they came out of the oven, I was salivating. I picked one up while still hot and ate it. Someone has to do quality control, right? Well, it seems that the rest of my family agreed, because one by one, they trickled into the kitchen, following the alluring scent of chocolate and coffee. With my back turned, they grabbed the cookies and I tried to shoo them away. My icebox cake would have been two inches taller if not for the sneaky hands of my younger brother who has a penchant for cookies.


I didn’t bake my chocolate cookies to be quite as crisp as advised because I like that soft and chewy texture. So I figured that the cake would be suitable to eat a couple hours after I had assembled it. The cookie layers were sufficiently softened and the cake was deliciously moist and rich. The next day, I cut myself another slice and to my slight surprise, the cake had transformed completely into a rich, dense, almost fudgy brownie with thin layers of cream in between. The coffee cream was more subdued and the two components blended seamlessly. Obviously, this is one of those cakes that just get better and better with time.

Click below for the recipe.

Friday, September 23, 2011

Icebox Cake Redux

Posted by - Dorrie

For a long time when I was a child my favorite birthday cake was an icebox cake that my mother would make with chocolate wafers and whipping cream. Using the whipping cream as glue between the wafers she would stand them up on their sides, form them into a loaf and then slather the whole thing with whipping cream and keep it in the refrigerator for 24 hours. By the time the birthday celebration rolled around the wafers were as soft as cake and so delicious!

Then a few weeks ago my mother called me all excited about an episode of The Barefoot Contessa that she had just watched. Apparently Ina Garten makes a delicious Mocha Icebox Cake, and uses a spring form pan - hooray! - no more delicate loaf making! Ina, who is not afraid of fat (yay!) also adds marscapone, kahlua, cocoa powder, etc. to her whipping cream - yum!

So when this month's Have the Cake challenge turned out to be Icebox Cake I jumped at the chance to make my own version of Ina Garten's icebox cake. As much as I love the sound of it, I skipped the marscapone, and because I was taking the cake to a dinner party with kids (including my own) I also skipped the espresso powder and kahlua.

My version goes like this:

In a stand mixer or with a hand mixer mix until it forms stiff peaks:

3 cups of heavy whipping cream

1/2 cup of sugar

2 Tablespoons of cocoa powder (I used the really nice Dutch stuff)

1 tsp vanilla extract

I lined the side of my spring form pan with butter and then parchment paper. On the bottom of the pan I made a layer of chocolate wafers (the Nabisco "Famous Chocolate Wafers"), filling in any holes between the round cookies with broken cookies. I then spread 1/5th of the whipping cream mixture on top and continued layering until there were 5 layers of cookies, each covered with whipping cream.

Layering the ice box cake
Layering the icebox cake

After the cake had spent 24 hours in the refrigerator I grated dark chocolate and white chocolate on top for a finishing touch. Here's the finished product, ready for devouring:

Finished cake
Finished cake

The cake was pretty on the outside and on the inside and tasted absolutely delicious:

Yummy!
Yummy!

We completely decimated the cake, several people going back for seconds (including myself). I love my new version of icebox cake and may never go back to the old loaf again. So delicious!

Thursday, September 8, 2011

As Ice Box as it is going to get!!!


Posted by - Vivian Thiele
http://letstrythese..blogspot.com
I had never heard of an Ice Box Cake and the process certainly was intriguing!  I didn't really follow any set recipe and I didn't exactly use cookies either.  During our last vacation, Neil and I went to a Russian grocery store.  They had these thin wafers packaged together. about 10 all together, and so we bought some with the intent on figuring out how exactly it was used in their recipes.  Well, I haven't figured that part out yet but we did have success with using it in our version of the Ice Box Cake.


These are the wafer layers.... if you have any idea how they are supposed to be used please do tell!
My layers were homemade whipped cream with cream cheese, and chocolate ganache.


I "iced" the cake with the cream cheese and whipped cream mixture then sprinkled on mini chocolate chips.
We were too impatient to let it set over night, but we did wait a good eight hours!  Turned out to be super yummy!

Wednesday, September 7, 2011

Strawberry Icebox Cake


Posted by - Rena

This was my second attempt at an icebox cake this week. I decided to get creative and make a lemon vanilla icebox cake with layers of non-fat vanilla pudding, low-fat graham crackers with lemon curd spread on the crackers. I layered everything but the color of the pudding was so unappetizing that I couldn't even eat it. It was a very artificial shade of yellow. Gross.

I have made the chocolate wafer icebox cake twice before so I wanted to try the strawberry cake from The Kitchn next. What could be bad about strawberries and cream? Nothing.

These cakes are so easy to make and so, so delicious. I made two layers of low-fat graham crackers, real whipped cream (with a dollop of vanilla bean paste and a very small amount of sugar) and fresh strawberries. I decided to leave out the chocolate because 1) I can't be trusted with a block of chocolate in the house and 2) I didn't think it was really necessary.

I was supposed to wait for 4 hours but I caved after 2. I'm sure it will be even better today now that the crackers have softened but it was tasty! I made a bowl of it instead of a loaf pan full because I have no will power. :)

Thursday, September 1, 2011

September Challenge: Icebox Cake

photo from Smitten Kitchen


Posted by - Rena

Happy September! I am thrilled that summer is almost over. It was a lovely summer but I'm ready for fall. It's still pretty warm out so I thought an icebox cake would be perfect to usher us into the next season. No one wants cold desserts when it's snowing! I always joke (to myself) that icebox cakes are the dessert version of casseroles. You can just layer away with goodies and somehow they all settle in nicely together. I first learned about these cakes from Smitten Kitchen. The recipe is super simple. I've made it twice and I swear to you, the cake tastes like a giant Oreo cookie. There are a million versions of icebox cakes that use ingredients such as pudding, cream cheese and whipped cream so have a look around the internet and find the one that suits you. I realize there isn't any baking involved, unless you'd like to bake your own cookies, wafers, cake or graham crackers but September is always busy so we can make something delicious without even turning on the oven!

Here are a few variations I found:
Cinnamon & Cream Cheese Icebox Cake
Strawberry Icebox Cake
Raspberry Icebox Cake
Lemon Graham Cracker Icebox Cake
Chocolate, Peanut Butter & Banana Icebox Cake
Nutella Icebox Cake

Happy Layering!

Thursday, September 30, 2010

September Roundup

Thank you to everyone that participated this month! I picked the challenge and then September got away from me. They all looked so delicious!

Looking forward to Raquel's pick next month!

Pretzels!

Posted by -Nancy

Cinnamon sugar

This month’s Have the Cake challenge was so much fun. Soft Pretzels. I had been craving them for some time and had actually just googled some recipes. So when the challenge was posted I was excited to get baking. Unfortunately I knew I would have to wait since we were moving mid month. And not just a little, across town move, but moving from Southern California to Austin, Texas. What’s a pregnant woman to do?

Once we arrived in Texas mid-month, we had to find a place to live. Then of course there was the unloading of the truck and unpacking. All of which becomes a bit more complicated when you throw a curious toddler in the mix. Finally on Tuesday, I decided I needed some baking therapy. Luckily I had my recipe picked out, all the ingredients, and time to wait for dough to rise.

First, the recipe I choose was from my friend Alton Brown. I love Alton, all of his quarks and his show “Good Eats”. As I searched for a recipe, I found a lot of them online. They were all basically the same, and since I wanted an all around, basic recipe I could embellish, as I felt needed, I went with Alton’s.

I choose naptime to start my dough since it was quiet and I could give my undivided attention to the task. Everything went together really easily, as I expected they would. I usually let my dough rise in a warmed oven (after it’s turned off), and I did this time also. As you can see, I had amazing rise on this dough.

Dough

It has risen

Once risen it was time to roll out and boil the pretzels. Since I don’t have a digital kitchen scale, I eyeballed my dough chunks to try to make them equal. I ended up with 13 balls, a baker’s dozen! The rolling out was simple, except for the fact that my son was upset I wouldn’t let him have more fruit snacks so he was “helping” by taking everything out of the pantry, putting it on the floor, and then “sweeping” it up. Time for some TV. Once he was settled with Curious George I went back to my boiling baking soda water and pretzels. One thing I learned about the baking soda water is to use a deep pot since it can overspray everywhere.

Time for a swim

Once the pretzels were boiled it was into the oven for 13 minutes. As you can see, the first batch came out a bit light, so they got a coat of melted butter and some cinnamon sugar topping. The second batch got the egg wash and salt before going into the oven and came out much more golden. And they tasted delicious. My husband gobbled them up and even my son, who usually avoids anything baked, ate half a pretzel with honey on it. This recipe is definitely a keeper!

Golden pretzels

Attack of the mutant pretzels

Here are the beasties post-boiling water bath.


After the bake and not looking too horrible all things considered.

The two best formed pretzels.

I used Alton Brown's recipe for Soft Pretzels found on the FoodTV.com. These are extremely tasty but I think I did something wrong as the dough was extremely sticky and difficult to roll out without the assistance of flour which wasn't called for in the recipe. Anyway I am very glad I managed to get the challenge done this month as August seemed to have run away with me and didn't make the galette.

Saturday, September 25, 2010

Soft Buttery Pretzels

Posted by - Vivian

Away from the sweet but still soft and delicious; that's what this month's challenge is for Have the Cake. I love a good pretzel and I could eat a dozen Aunt Annie's pretzels. Well, I've never eaten a dozen pretzels but I don't think it would be too hard if I put my mind to it!

I found this recipe for butter pretzels on the allrecipes web site. They weren't difficult to make and while it is a bit time consuming to make your own pretzels, it is certainly worth it. The only downfall to this recipe was that it only made a dozen. However, homemade pretzels do not keep well so maybe only making a fresh dozen is a good thing. I adjusted the recipe a bit, adding melted butter instead of oil, reducing the flour and topping the freshly baked pretzel with more melted butter. Find the original recipe here.

I have since made this recipe twice as the first batch was gobbled up quickly.  I sent two home with my son in law and my daughter called me to say, "Lose this recipe and die!"  She also told me that this is the "cake" she wants for her birthday this year.  I would have to say that this is most certainly a keeper recipe.

Wednesday, September 22, 2010

Nellie's Sourdough Pretzels

Posted by - Dorrie

I was intrigued by this month's Have the Cake challenge, pretzels, as chosen by Rena, and so I felt that I should definitely try to make the time to participate. It is rare that I have the time to bake, (as shown by how little I post on HTC) as I really need both of the kids to be napping to get any work done. Since my sourdough start should be used and "fed" every ten days and I had last touched the stuff oh, three weeks ago, I searched high and low for a sourdough pretzel recipe - two birds, one stone! It was a little difficult, but I finally found one on Group Recipes.

As a side note, during my recipe search I found several sourdough bakers who have named their sourdough, which I find, well, a little odd. Granted, I do think of it as a sort of pet that lives in my refrigerator. My sourdough pet demands flour and milk and gets nasty if I ignore it, but I never thought of naming the stuff! In the interest of perhaps treating the start better if I do name it, the start has now been named "Nellie". Nellie was my great-grandmother who grew up in San Francisco and who passed the start down to my mother. So, Nellie, would you like to make some pretzels?

Twenty-four hours before I was going to make the pretzels I got Nellie out of the fridge and took 1 cup out and added a half a cup each of milk and flour. Anna wanted to help - she's an excellent stirrer - so here she is mixing the start and getting it ready to proof:

Anna stirring the start

Twenty-four hours later I scuttled Anna off to the drop-off daycare place (she cries if I turn on my Kitchen-Aid mixer), put Henry down for nap and began to make the pretzels.

Sourdough Pretzels:

1 1/2 cups sourdough start

1 cup hot water

3 Tablespoons sugar

2 Tablespoons butter (the baker did not specify, but I assumed unsalted butter, and then not paying attention again I accidentally added 3 Tablespoons instead of 2 - worked out in the end!)

2 tsp salt

@5 1/2 cups flour

I warmed up about 3 cups of hot water and then put 1 cup of water, the sugar, butter and salt into a bowl and mixed them. When that was cooled to lukewarm I used the remaining hot water to warm up my mixing bowl and then put the proofed start and the water/butter stuff in the bowl and mixed them. I then added flour a 1/2 cup at a time until the dough balled up and came away from the sides of the bowl - which ended up being about 4 cups of flour.

After that, I put the dough down on my lightly floured pastry board. My beloved husband surprised me a few weeks ago and bought me the best pastry board! It's a lovely wood board with a lip to hold it on the counter and a lip to keep the dough from rolling off the top, rulers on the side and top and circles for different diameters of crusts. Thanks honey! Anyway, here is the dough on the new board after I kneaded it and added probably another 3/4 cup of flour:

Pretzel dough
Pretzel dough

I kneaded it until it became smooth and not sticky, "like a baby's bottom", as my mother used to say, and since I change a lot of diapers, I know exactly what that feels like...

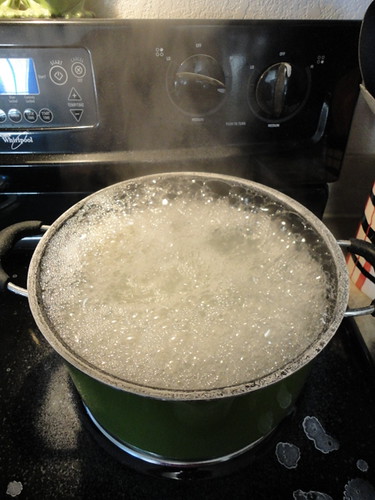
I put the dough into a greased bowl, rolled it around to coat it and let it rise for 2 hours. At that point I put a pot on the stove and began boiling water while I took egg size pieces of dough and rolled and twisted them into pretzels. Once they were done and the water was boiling I put a few pretzels into the water at a time until they rose to the surface and then put them on a baking sheet. (Note for next time - the recipe does not say to put them on a greased baking sheet and I won't be making that mistake again - grease that sheet!) The recipe doesn't say this, but I did it anyway; I beat an egg with a little water and then brushed that on each pretzel before I generously sprinkled them with Kosher salt.

During this whole process, while I was rolling and baking the pretzels, Henry sat on the couch and moaned... Poor thing had his 6 month birthday/check-up that day and was not doing well with the four shots he had received at the doctor's office. See, he looks pitiful doesn't he?

Henry - looking pitiful

I popped the pretzels into my preheated 425 degree oven and baked them for what ended up being 19 minutes. My husband ate 4 of them before they had a chance to cool - and said something in between bites about, "You could make me a batch of these every week!" Okay then - I think we did good Nellie!

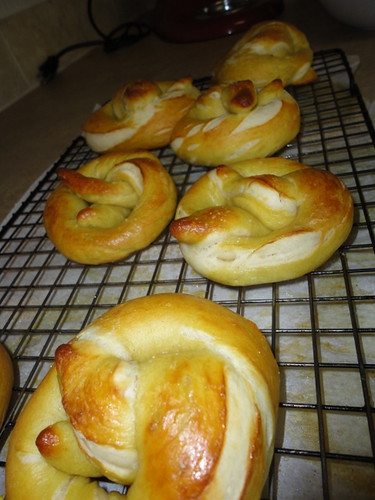
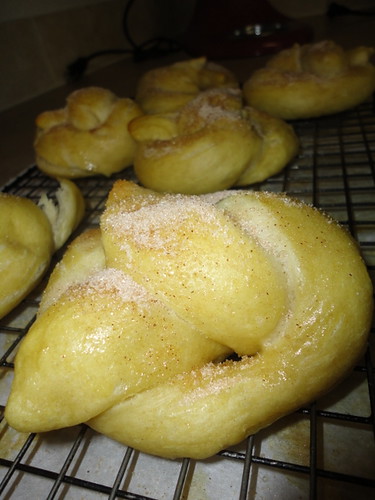
Here's a picture that I took of the finished pretzels before they were eaten:

Finished Pretzels
Finished Pretzels

They were very yummy!


Sunday, September 19, 2010

Big & Chewy Soft Pretzels

Posted by - Louanne

Everytime we buy a pretzel from Auntie Anne's Pretzel shop in the mall, I say, "I bet I could make these," to which my husband replies, "yeah, you probably could and should."  Well, many thanks to Rena for choosing soft pretzels for September's Have the Cake theme, because I finally got into the kitchen and made them!  I used Alton Brown's recipe, which had a yield of 8 pretzels, plenty enough for a family of three.  I mixed the dough in my stand mixer, and I think the process would be quite difficult without the use of it.  Also, the dough is a little difficult to work with, initially, but I had a hair appointment and after I mixed the dough, I oiled the bowl and placed it in the refrigerator.  By the time I had arrived back home, six hours had elapsed, the dough had risen, and it was super easy to work with....at first.  I found the rolling of each piece into the required 24" length somewhat frustrating, and after 6 misshapened pretzels, I made a braid, and Andrew, my 5-year old, made the last piece into a roll.  The braid was actually quite easy, and the next time, I'll made them all into braids, because yes, I would definitely make these again!  Both Brett and Andrew gave them 2 thumbs up, with Andrew telling me "these are the best, Mom!"  One of the reasons I had never made them before was of the brief process of immersing the pretzels into boiling water.  This step turned out to be very quick and easy, so don't let that deter you.  The pretzels are declicious and without comparison to those at the mall.
Find the recipe here


Monday, September 13, 2010

Big Soft Pretzels


Posted by - Michelle

This month's Have the Cake is soft pretzels. Thanks, Rena, for choosing this for our theme! I have not made soft pretzels in my teens! I love to eat pretzels. I was originally going to do a copy cat of Auntie Ann's pretzels. My I found this one in my recipes that I wanted to try. I used to get the recipe cards from Grandma's Kitchens and this was one of them. It looked simple and I had all the stuff. I made these yesterday.

It was super simple. I didn't really enjoy rolling the dough out. The recipe called to make 30. They must be very thin pretzels. I made my thick....I got 9! These came out sooooo delicious! I will make these again and again.

Ingredients:

1 envelope dry yeast
1 1/2 cups war mater (110-115 degrees)
3 cups all-purpose flour
2 tsp sugar
1 tsp salt
1 large egg, beaten
1 T coarse salt

Directions:

1. Dissolve yeast in warm water in a large bowl. Sift flour, sugar and salt into yeast mixture and mix well.

2. Knead dough on lightly floured surface until smooth and elastic, about 5 minutes. Cover with plastic wrap. Let stand for 10 minutes.

3. Preheat the oven to 45o degrees. Grease baking sheets.

4. Divide dough into equal portions. Roll each portion into an 18-inch rope. Loop into pretzel shapes. Arrange on prepared baking sheets.

5. Brush the pretzels with beaten egg. Sprinkle with coarse salt. Bake until golden 10-15 minutes. Serve immediately or store cooled pretzels in an airtight container for up to 3 days.

Friday, September 10, 2010

Soft Pretzels


This one kind of looks like a cinnamony lump, but it was good!


Posted by - Michele


This month's Have the Cake challenge was chosen by Rena. She picked soft pretzels! Thank you Rena for such a cool idea. I have never made soft pretzels before but I was up for the challenge.

After searching the internet, I decided to use a recipe I found here on All Recipes. I mixed up the dough and waited about an hour and a half until it was nicely risen. Then I started to attempt to make pretzels. I thought they were coming out fine until my 14-year-old son came into the kitchen. "Ummmm, mom. Those don't look like pretzels. Let me try." To my amazement, he made pretzels better than me. His are the one's all the way up at the top that actually look like pretzels.

Anyway, we had lots of fun making the pretzels. And even thought mine didn't look beautiful, they were delicious. I dipped some in cinnamon sugar and I salted some. Both were awesome!