Saturday, June 1, 2013

Closing Up Shop

Posted by - Rena 

Happy June! 

After much thought I have decided it's time for Have the Cake to close up shop. It's been so wonderful getting to spend these past few years reading through your baking adventures. This blog was started in 2009 with 4 of my close girlfriends in the hopes of getting us to bake more and share our experiences. The blog grew as we added more and more bakers every year. Thanks so much for sharing your recipes, successes and failures. It was always a fun read! 

The blog will stay up so you can always revisit the posts. 

Much love and happy baking! 


.

Thursday, May 30, 2013

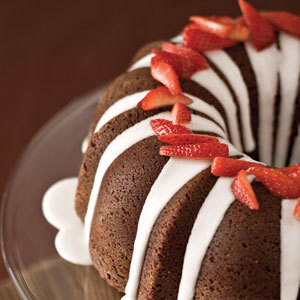
Peanut Butter Chip Bundt Cake

Posted by - bakingaddict


I've been on a bit of an American baking spree lately. Probably due to the fact that I unpacked my box which contained all the goodies that I brought back from America last year. I decided to make a simple peanut butter chip bundt cake as I wanted to use my peanut butter topping as a drizzle. I have been patiently waiting for the right moment to open this bottle of peanut butter goodness. If you've not tasted it before, you really have to get yours hands on one as it's divine. Its basically like smooth, melted peanut butter. It worked really well as a topping to the cake. I had extra on my slice :) The cake itself was light and tasty and the peanut butter chips gave the cake a 'sweet and salty' taste which everyone enjoyed.


  amazing peanut butter sauce


 adding peanut butter chips

 ready to go in the oven

 fresh from the oven

 with peanut butter topping


 a slice of heaven

250g butter
230g caster sugar
250g self raising flour
4 eggs
2 tablespoons yoghurt
150g peanut butter chips
peanut butter topping

  • Preheat the oven to 180C.
  • Cream the butter and sugar until light and fluffy. 
  • Add in the eggs, one at time and mix well.
  • Add in the flour.
  • Finally stir in the peanut butter chips.
  • Pour into a bundt tin and bake for 45 - 50 minutes or until a skewer comes out clean. 
  • Allow to cool completely before adding drizzle. 

Thursday, May 2, 2013

May Challenge: Bundt Cake

Posted by -  Dorrie

Happy Spring everyone!  I'm guest posting this month for Rena, who is extremely busy these days!

Hopefully, despite the weather warming up and the trees in bloom, you'll want to stay inside for a few moments to complete this month's challenge: bundt cake.

(photo is from Tumblr - nakakagutom)

Here in the U.S., bundt cakes are made in ring molds, but for which there is no specific cake recipe.  The shape is similar to the European Gugelhupf or the German Bundkuchen, which are brioche-like fruit cakes. 

Bundt cakes are beautiful and require only a little frosting or glazing, but are a little work up front as the pan needs a lot of butter and flour in order to have the cake come out clean.  Because of their height bundt cakes are often fun to fill with pudding or fruit fillings, but this can be tricky!  (Hence that's part of the challenge!)

Since bundt cakes can come in all flavors, varieties and fillings I look forward to seeing where your taste buds lead you with this challenge.  Happy Bundt Cake baking!


Monday, April 1, 2013

April Challenge: Upside Down Cake

Posted by - Rena

It's finally starting to feel like spring in the US! I for one am done with winter and am ready for a little bit of sun and watching everything start to bloom.
Now that fruits and vegetables will become plentiful in the markets, I thought it would be fun to make upside down cakes. I've only seen pineapple upside down cakes but upon further investigation there are upside down cakes made with a variety of fruits including apples, nectarines and cranberries.

I've never made one myself so this is going to be fun! Looking forward to seeing what you create!

photo and link to recipes from MarthaStewart.com

Sunday, March 24, 2013

Shahi Tukray - Royal Bread Pudding

Posted by - Dixya @ Food, Pleasure, and Health


Shahi Tukray aka Royal bread pudding is very traditional, true Royal indulgence dating back to Mughal Empire's era. I am not a big fan of any desi dessert but I have a huge sweet tooth and big heart for this particular one.


Typically, a piece of toast is deep fried in ghee (clarified butter), soaked in heavy cream or full-fat milk infused with saffron thread, sugar, & topped with nuts/dried fruits. 

I re-created skinny version by using tea rusk (toasted bread can also be used) rather than frying bread. Also,I skipped heavy cream/whole milk and I opted almond-milk..but feel free to use whatever milk you regularly drink.


This is not your Royal decadent shahi turkay but it's really good-taste and texture wise. My parents, who are pretty serious about their dessert were also pleased with the final result. And me, I ate three pieces happily in one sitting with way less calories and fats. 


Skinny Shahi Tukray

Ingredients
8 tea rusks
1.5 cup milk
1/4 cup sugar
2 tablespoon condensed milk
1 teaspoon ground cardamom
1/2 teaspoon ground cinnamon
handful chopped almond (or pistachios)

Directions
-Arrange tea rusks in a small tray and keep it aside.
-In a small sauce pan, over medium heat, warm milk, sugar, condensed milk. Add cinnamon and cardamom and stir them Allow it to thicken for about 10 minutes.
-Remove it from heat. Allow it to cool for 5-10 minutes.
-Gently pour it over tea rusks, making sure it covers the bread.
-Leave it in the refrigerator for an hour or so.
-Serve it with chopped almond.

Tuesday, March 12, 2013

Caramel Croissant Bread Pudding

Posted by -Rhonda's Saucy Adventures
I am so happy "Have The Cake," March challenge is BREAD PUDDING. 
  Sometimes I top my bread pudding with caramel ice cream topping, so I thought I would create a recipe with caramel topping in the recipe. I thought it tasted really good, my younger son couldn't even tell caramel was in the recipe.
 Click here to see all the recipes I have tried.

Ingredients
14 croissants (medium size)
6 large eggs
1 cup sugar
4 cups half&half
1/3 cup caramel ice cream topping
1 tablespoons vanilla extract
1 teaspoon cinnamon

Topping (optional)
1/3 Cup sour cream
2 teaspoons sugar
caramel ice cream topping

Directions:
  1. Slice croissants in half lengthwise; tear bottom halves of croissants into bite size pieces.
  2. Layer croissant pieces in a large baking bowl. I have also used cast iron pans and 9x13 baking pans. Place croissant tops, crust sides up, over mixture.
  3. Beat together with an electric beater eggs, caramel ice cream topping, half&half, cinnamon vanilla and sugar. Slowly pour mixture over croissant tops; press bread to absorb liquid. Cover; chill for1 to 2 hours.
  4. Place baking bowl into a large jelly pan. Pour hot water into jelly pan, filling half full. I skip this step when I use the cast iron pan. Because~I don't have anything that fit my cast iron pan.
  1. Bake at 350° for 45 minutes or until set. Cover with aluminum foil, and bake 15 more minutes. Remove from oven, and remove dish from water pan.
  2. I wanted to topped the pudding with Cool Whip but I didn't have any so I decided to use sour cream instead. I love sour cream in breakfast crepes and on top of cheesecake so I thought I should give it a try. I put 2 teaspoons sugar and 1/3 cup sour cream in a bowl and mixed together. I topped the bread pudding with the sour cream mixture and drizzled with caramel ice cream topping. I really liked this and can't wait to let my family try it.

Saturday, March 2, 2013

March Challenge: Bread Pudding

Posted by - Rena

Happy March! Wow, February flew by. Thanks to our marshmallow challenge participants. They looked lovely and I'm sure tasted even better!

The challenge for March is bread pudding. It has taken me quite a long time to warm up to bread pudding and now I love it. There are so many possibilities for variations on the classic recipe. I'm excited to see what you come up with.

Happy baking!

photo from MarthaStewart.com

Sunday, February 24, 2013

Marshmallows - 1 Fail and 1 Success

Posted by - Dorrie

I've wanted to make homemade marshmallows ever since I went to New York City in October and had the most wonderful hot chocolate at City Bakery.  It's not your usual hot chocolate, but instead melted chocolate with milk and has been rated the best hot chocolate in the country.  For a little extra money you can have a homemade marshmallow on top of it too:
City Bakery Hot Chocolate
(Please note New Yorkers - City Bakery is having a hot chocolate festival in February and is doing a different flavor every day!)

The marshmallow in the hot chocolate was exceptional; my favorite thing to do was spoon the hot chocolate over the marshmallow and then work a little chunk of chocolatey marshmallow off for myself.

So when this month's Have the Cake challenge turned out to be marshmallows I was quite excited to participate.  Last Thursday I went to the kitchen intending to make a marshmallows from a recipe I found on Smitten Kitchen only to find that I did not have any gelatin in the house.  Disappointed, I hopped on the web to see if I could find any marshmallow recipes that did not have gelatin in them.  Since vegans object to the content of gelatin I was able to find several recipes, one on a gluten-free cooking blog which substituted xanthan gum and cream of tartar for the gelatin.

I happily started in, despite having to convert the recipe from grams to cups, and it all looked good.  The marshmallow formed into a nice fluffy ball in the mixer:
bad marsh in mixer
I poured the marshmallows into the pan, dusted them with powdered sugar, and popped them into the fridge, hopeful that they would turn out great.  Instead, the next day I cut into a thin globby (definitely not fluffy!) mass unlike any commercial marshmallow; and not tasty at all.
bad marshmallows
Seeing them on the pretty pink plate Anna desperately wanted to try one, but this is the face that she made when she got a little bit of it in her mouth:
Anna says yuck!
Anna says yuck!
I tossed the whole pan out in disgust and trounced off to the store to buy gelatin...
Today while we were stuck inside under a blizzard warning I had a chance to try again with the original Smitten Kitchen recipe for marshmallows. While the world outside was quickly covered in fluffy white stuff, I made my own fluffy white stuff in the kitchen:
Blizzard
Again, the marshmallows fluffed up nicely in the mixer and poured into the pan beautifully:
good marsh in pan
I dusted them with powdered sugar, put them in the fridge and waited 3 hours for the results.  I cut into the marshmallows and was overjoyed to find a fluffy square quite comparable to the marshmallows we all know and love.
Good Marshmallows
And fortunately the recipe makes plenty so I have lots to share with friends and family:
plenty
I think tonight we'll be making s'mores using the broiler with our homemade marshmallows while watching the snow fall!

Wednesday, February 13, 2013

February Challenge Marshmallows

Posted by - Rhonda's Saucy Adventures
I am so glad that February's challenge is marshmallows...they will make great Valentine's day gifts.   I have always wanted to make marshmallows but never had the courage to give them a try.   I followed one of Martha Stewart's recipe and they are DELICIOUS, especially dipped in chocolate. click here for recipe.

Friday, February 1, 2013

February Challenge: Marshmallows

Posted by - Rena

Happy February!

Our challenge this month is to make marshmallows or make a dessert incorporating marshmallows. I've always wanted to try making my own marshmallows but most recipes require a standing mixer, which I don't have sadly. There is a local bakery that offers a "high hat" cupcake which is a chocolate cupcake with marshmallow frosting dipped in chocolate. It's ridiculously delicious.

Looking forward to seeing what you come up with! Happy Baking!


Wednesday, January 30, 2013

Vanilla Love Cupcakes with White Chocolate Truffle Centers


I made cupcakes for one of my dear friends Shannon who had a lunch party at her house earlier today. I've known Shannon for many years since we live just around the corner from each other, but it wasn't until our boys played on the same baseball team a few years back that we got to be really good friends. Shannon has a great heart, with a little "firecracker" thrown in for fun. She's super thoughtful AND she's a great shopping buddy. Her family has been through a lot in the past year and a half, and through it all, she's handled it with grace and love, concern and caring. Last year, I wrote a post where I was musing about all kinds of things including life being beautiful, and one of the things I wrote was, "Beauty is in the strength of a mother (and my beautiful friend) taking care of her child with cancer, who would do anything to make it better for him." I was thinking about my friend Shannon when I wrote that. It's been a long hard road for them and there's still some road to travel, but things are going in the right direction. Even with everything they've been through, she makes time to connect with other families who are going through the same thing, like this lunch she had at her house where she invited several of those families to enjoy a fun and relaxing afternoon with her family. It was my pleasure to make cupcakes for them.

Since it's so close to Valentine's Day, I made luuuv cupcakes (said in a Barry White voice). Shannon isn't a big chocolate fan, so I made vanilla cupcakes with vanilla buttercream frosting. Everyone's good with vanilla, right? Just to keep it from being too "vanilla", I added a white chocolate truffle center to the cupcakes. You might have seen images all over Pinterest where you stick a Lindt truffle in the center of a cupcake right after it comes out of the oven, and that's exactly what I did. Easy!

I used a new vanilla cake recipe for these cupcakes. I'm always on the search for a great vanilla cake recipe. I tend to like stronger flavors so when I do eat a vanilla cupcake, it's got to be really good to win me over. I found this recipe at Glorious Treats called "Perfect Vanilla Cupcakes". That's quite a claim! I think she did pretty well with this recipe, much better than some other recipes I've tried. After reading the reviews and my own trial run, I made a few adjustments to the recipe like increasing the sugar just a tad, decreasing the salt a smidge, sifting the dry ingredients, and adding the vanilla at the end since I read somewhere that vanilla dissipates quickly and should be added to the end of the mixing (is that even true? I've thought that for years). I also had to increase the cooking time from the original recipe quite a bit but it will vary depending on ovens. I just checked every two minutes until they were done.

Once the cupcakes were cooled, I frosted them with my favorite vanilla buttercream frosting from Cook's Illustrated. It's easy, reliable, and delicious. Because I was in the mood for love, a divvied up the frosting into 3 bowls, left one untinted, tinted one pink, and tinted the last one red and made the cupcakes look all valentinesy.

When I dropped off the cupcakes at Shannon's house last night, her son Nate took one look at them and said, "Those are so perfect! I don't think they'll make it to lunch tomorrow!" That made my heart happy. Then I was rewarded with a plate of homemade cookies and a cupcake calendar. Isn't friend-love grand? JOY!
vanilla love cupcakes with white chocolate truffle center

Vanilla Love Cupcakes with White Chocolate Truffle Centers
Adapted from Glorious Treats
Printable version (including buttercream frosting recipe below)
Makes 12 cupcakes

Ingredients:
1 1/4 cups cake flour
1 1/4 teaspoons baking powder
1/2 teaspoon baking soda
1/4 teaspoon salt
2 eggs
1 cup sugar
1/2 cup oil (vegetable, canola, or extra light olive oil)
1/2 cup buttermilk (see Glorious Treats for vinegar/milk alternative)
1 1/2 teaspoons pure vanilla extract
12 Lindt (or other brand) white chocolate truffle balls

Preheat oven to 350 degrees fahrenheit. Line standard-size muffin pan with baking cup liners.

Sift cake flour, baking powder, baking soda and salt in a medium bowl. Set aside.

In a standing mixer with the whisk attachment (you can use a hand mixer too), add eggs and beat 10-20 seconds. Add sugar and continue to beat on medium speed about 30 seconds. Add oil and beat for another 20-30 seconds.

Reduce mixer speed to low and slowly add about half of the flour mixture. Add half of the buttermilk, then the rest of the flour, then the rest of the buttermilk, and the vanilla. Beat until just combined. Scrape down the side of the bowl.

Pour batter into prepared muffin pan. Fill liners about 2/3 full. These do rise pretty well and I guess I filled most of mine a little more than 2/3 full because they did overflow a little bit and created a little mushroom top effect. That's not a big problem for me but if you prefer a cleaner looking top, keep it at 2/3 or a little less full.

Bake cupcakes for 12-18 minutes. Mine took about 18 minutes but other reviews showed they were done as quickly as 12 minutes, so I recommend you start checking around 12 minutes and check every 2 minutes. Cupcakes are done when they spring back to the touch and a toothpick comes out clean.
vanilla love cupcakes with white chocolate truffle center

While cupcakes are in the oven, unwrap truffles and set aside in a bowl. As soon as the cupcakes come out of oven, set pan on a rack and insert a truffle right into the center of the cupcake, pushing it down about 3/4 way in so some of it still peeks over the top of the cupcake. It will melt and settle in the rest of the way and stay softened even after cooling. You might even have a little divot there after they're fully melted; just fill it with frosting. :)
vanilla love cupcakes with white chocolate truffle center

Cool cupcakes in pan for 10-15 minutes, then carefully remove cupcakes from pan and cool completely on a wire rack. Once cool, frost with vanilla buttercream frosting {recipe below} and decorate to your heart's content!

Vanilla Buttercream Frosting
Adapted from Cooks Illustrated
Makes 3 cups

Ingredients:
3 sticks (1 1/2 cups) unsalted butter, softened
3 cups confectioners’ sugar
1/4 tsp table salt
2 tsp vanilla extract
3 Tbsp heavy cream

In standing mixer fitted with whisk attachment, beat butter at medium-high speed until smooth, about 20 seconds.

Add confectioners’ sugar and salt; beat at medium-low speed until most of the sugar is moistened, about 45 seconds.

Scrape down bowl and beat at medium speed until mixture is fully combined, about 15 seconds; scrape bowl, add vanilla and heavy cream, and beat at medium speed until incorporated, about 10 seconds, then increase speed to medium-high and beat until light and fluffy, about 4 minutes, scraping down bowl once or twice.

Someone asked me about what vanilla I used for this. Since vanilla is the star in this cupcake, I recommend you use a good quality vanilla. I use Nielsen Massey madagascar bourbon pure vanilla extract. Some people might choose to use the scraping from a real vanilla bean or vanilla bean paste. I say go for it! According to the folks at Nielsen-Massey, one teaspoon of vanilla extract is about equal to one vanilla bean or one teaspoon of vanilla bean paste or 1 teaspoon of vanilla powder.
Also, the white chocolate truffle does add an extra sweetness to these. If they're too sweet for you, consider decreasing the sugar in the cupcakes by 1/4 cup or using dark or milk chocolate truffles instead (my personal preference), or leave out the truffle completely.
*If you want to have the truffle center be all melty-gooey, then these are best served the same day you make them. The truffles do harden back up a bit the next day, but I actually prefer it that way.

Wednesday, January 23, 2013

Vanilla Cupcakes with Salted Caramel Filling & Salted Caramel Frosting

Posted by - Dixya @ Food, Pleasure, & Health


...if you have dirty dishes piled up, laundry that needs to be done ASAP, unread mail that needs to be opened, vacuuming, scrubbing and all that business Or, if you are an overachiever and have done all that (please come help me), fine don't- I like cleaning too but just not right now. Not today. 

If you are little overwhelmed like me, go run to your kitchen & surround yourself with heavy cream, flour, butter, sugar, sea salt and make a huge batch of salted caramel frosting, salted caramel filling and extra vanilla-y cupcakes and in the process pile up more dishes - what the hell you will be doing heck of a cleaning later anyways. The whole process is extremely therapeutic - it only takes a spoonful or two (but who's counting right) salted caramel frosting to calm this clean freak. I don't like when things are scattered here, there and everywhere but when I am not in the mood to clear the space I make candied salted caramel.. lets not clean today but shall we be creative, please? And eat all the cupcakes I want! 


Vanilla Cupcakes 
 

Makes about 6 cupcakes

Ingredients
  
3/4 cups all-purpose flour 
1/2 tsp baking powder
dash of salt
3 tablespoon unsalted butter (softened)
1/2 cups sugar (add less if you like less sweeter taste)
1 large egg
1 Mexican vanilla bean (scrape with pairing knife)
1 tsp pure vanilla extract


Directions
 
-Leave butter and eggs in a room temperature for an 1/2 hr or so
-Pre-heat oven to 350 degrees
-In a medium bowl, whisk flour, baking powder and salt together
-In KitchenAid Stand mixer (if using that) or a separate bowl, cream butter and sugar until light and fluffy. Then add egg to the mixture and continue beating it in medium speed then add vanilla extract and vanilla bean paste until everything is incorporated.
-Scrape the sides of a bowl

- Add flour and milk alternatively to the butter- sugar mixture and continue until everything is well combined.
-Divide batter and pour it in a lined cupcake pan filling about 2/3 full
-Bake for about 18 minutes or until the toothpick comes out clean
-Remove from oven and allow it to cool completely


While the cupcakes are in the oven, go ahead and make the most legit frosting of all times - Salted Caramel Buttercream Frosting. The recipe is from Taste of Home fairly easy & requires almost the same ingredients as the caramel filling (recipe below). The recipe calls for leaving it in refrigerator for 4 hours but I left for only 2.5 hours. The final result was extremely fluffy, too good to be true and had to stop myself from tasting licking the bowl.. Its for 10 cupcakes but go ahead and make the full recipe. You can thank me later. 


I hope we all feel same way about Salted caramel filling inside a cupcake right? It perfectly compliments the vanilla cupcakes and keeps the center super moist. I adapted the recipe from 52kitchenadventures & halved it. This is one of the easiest, no fail recipe & I added sea salt to finish it off.

Normally, I have no patience - we all know that. It gets worse when there are cupcakes on a cluttered counter top and caramel butter cream frosting heaven in the refrigerator- try resisting that..its almost painful but today I am trying to be patient and not obsess about messy house or dirty laundry. I want to bring out the hidden patient, creative side of me and decorate these babies with salted candied caramel. The recipe is from Cupcake Friday Project. These candied caramel thingy always intrigued me on TV - it was pretty cool (although I burned it a little bit) but that's my attempt to be creative.


Okay, seriously,this patience business is starting to annoy me and me want some cupcakes. Can we assemble them already?

First whip up the butter cream frosting as directed in the recipe. Stir the caramel filling and get ready for some serious cupcake! Use a pairing knife to cut the center of cupcake, add about 3/4-1 tablespoon filling in the center and frost it. Adorn them with caramel candies. Sprinkle some sea salt.
Although it was little lengthy of a process, each component of this cupcake was worth it..slightly sweet vanilla cupcakes was perfect with salted caramel filling and the frosting - it was spectacular. Candied caramel spirals added a slight crunch which I enjoyed a lot. Let's just say it was worth every minute, every calorie/fat/sugar consumed because guess what - I need all that energy, for I have massive cleaning to do!

Friday, January 18, 2013

Lemon and Blueberry muffins

Posted by - Rhonda's Saucy Adventures
Lemon and Blueberry muffins

Recipe adapted from BBC Food

I found two recipes that looked really good...I couldn't decide so I made both. These were my husbands favorites. I had extra crumble left over from the other recipe so I put it on top of these mini muffins. I liked both muffins so I will keep both recipes in my GO TO binder.

Ingredients

1/2 cup butter
1 tsp baking powder
1/2 cup sugar, plus 2 tsp for sprinkling
1/2 cup blueberries
1 tbsp lemon juice
zest from 1 lemon
2 eggs
5fl oz lemon yogurt

Directions

  1. Preheat the oven to 400F. Line a 12-hole deep muffin tin with paper cases.
  2. Melt the butter in a small pan over a low heat then set aside to cool for a few minutes.
  3. Sift the flour and baking powder into a large bowl and stir in the sugar, blueberries and lemon zest. Make a well in the center.
  4. Beat the eggs with a whisk until smooth then beat in the yogurt, milk and melted butter until well combined. Stir into the flour mixture with a large metal spoon until very lightly mixed.
  5. Divide the batter between the muffin cases. Place a teaspoon of the lemon curd on top of each one and sprinkle with the remaining sugar. Bake for 20 minutes or until well risen and golden-brown. Serve warm or allow to cool on a wire rack. (The lemon curd will be very hot, so don’t eat as soon as they come out of the oven.)

Wednesday, January 2, 2013

Happy New Year! January Challenge

Posted by - Rena

Happy New Year!

This month's challenge is to make cupcakes, muffins or popovers. Basically the challenge is to make anything that fits nicely in a muffin tin. Who doesn't like a cupcake?! Since I'm sure we all ate enough for 2013 over the holidays, feel free to make muffins or popovers as well. Popovers are one of my favorite things but take a little finesse to make from scratch.

Hope everyone had a wonderful holiday and a very happy new year! Happy 2013!

photo from MarthaStewart.com

Thursday, December 27, 2012

Chicken Patties (a savory strudel alike)

Posted by - Dixya @ Food, Pleasure, and Health


I can't believe Christmas went by so quickly and New Years is only a couple days away- WHAAAT.. I am still in denial and don't want to stop eating more cookies in the name of holidays! 

But at the same time I am excited to welcome 2013, a new year, new beginnings. Hope it will be another year full of happiness, success and good health. Lots of wishes from me to you and your family 

On any other day I probably would not have promoted this recipe - buttery, flaky chicken patties but c'mon its New Years - it deserves special attention; it comes just once a year - 365 days. 52 weeks. All I am trying to say warn you is - don't get too hooked because this buttery, flaky pastry sheets stuffed with flavorful chicken pieces are pretty hard to stop after your first bite. Even though every bite is so worth the calories, I usually save it for the special moments like these, a New Years gift from me to you!


...I love how these chicken patties take me back to middle school; times where I securely held on to my mother's hand and walked swiftly towards a small bakery after school that displayed colorful pastries, old-fashioned glazed doughnuts, different cookies, and patties. I occasionally craved for cream rolls but chicken patties & I were BFFs.


Still today, when I take a bite of this, I go back to a time where life's biggest concerns were chicken patties, more play time, and less homework!  So simple, so naive... 


Its like eating soft, buttery sheets with a spicy chicken surprise waiting inside but feel free to add other fillings of your choice: potatoes, mix veggies, paneer or whatever tickles your fancy! 


All you need are puff pastry shells, filling of your choice, and ten minutes of patience! I eyeballed all the ingredients, so please adjust it to your liking all you want.

Chicken Patties

Ingredients
boneless chicken tenderloins (may use chicken breast too)
milk
chicken tandoori masala
Miracle whip
hot sauce
salt & pepper

*note- i used puff pastry sheets but i highly recommend using shells.

Directions
- In a sauce pan, boil milk and add chicken with tandoori masala until chicken is cooked.
-Shred the chicken and place it in a bowl
-Mix in with more tandoori masala, hot sauce, miracle whip, salt and adjust the taste as needed

The main goal is to make sure the chicken is not too dry and adding Miracle whip/mayonnaise helped keep it moist.

-In a preheated oven @ 400F, place pastry shells/sheets for 10 minutes or so until it turns slightly yellow/brown and top pops up
-Place the fillings and put it back in the oven for additional few minutes until its evenly golden

Serve it hot and this recipe stores well in the freezer. Simply reheat it in a toaster oven and enjoy :)


See you all next year!

Monday, December 10, 2012

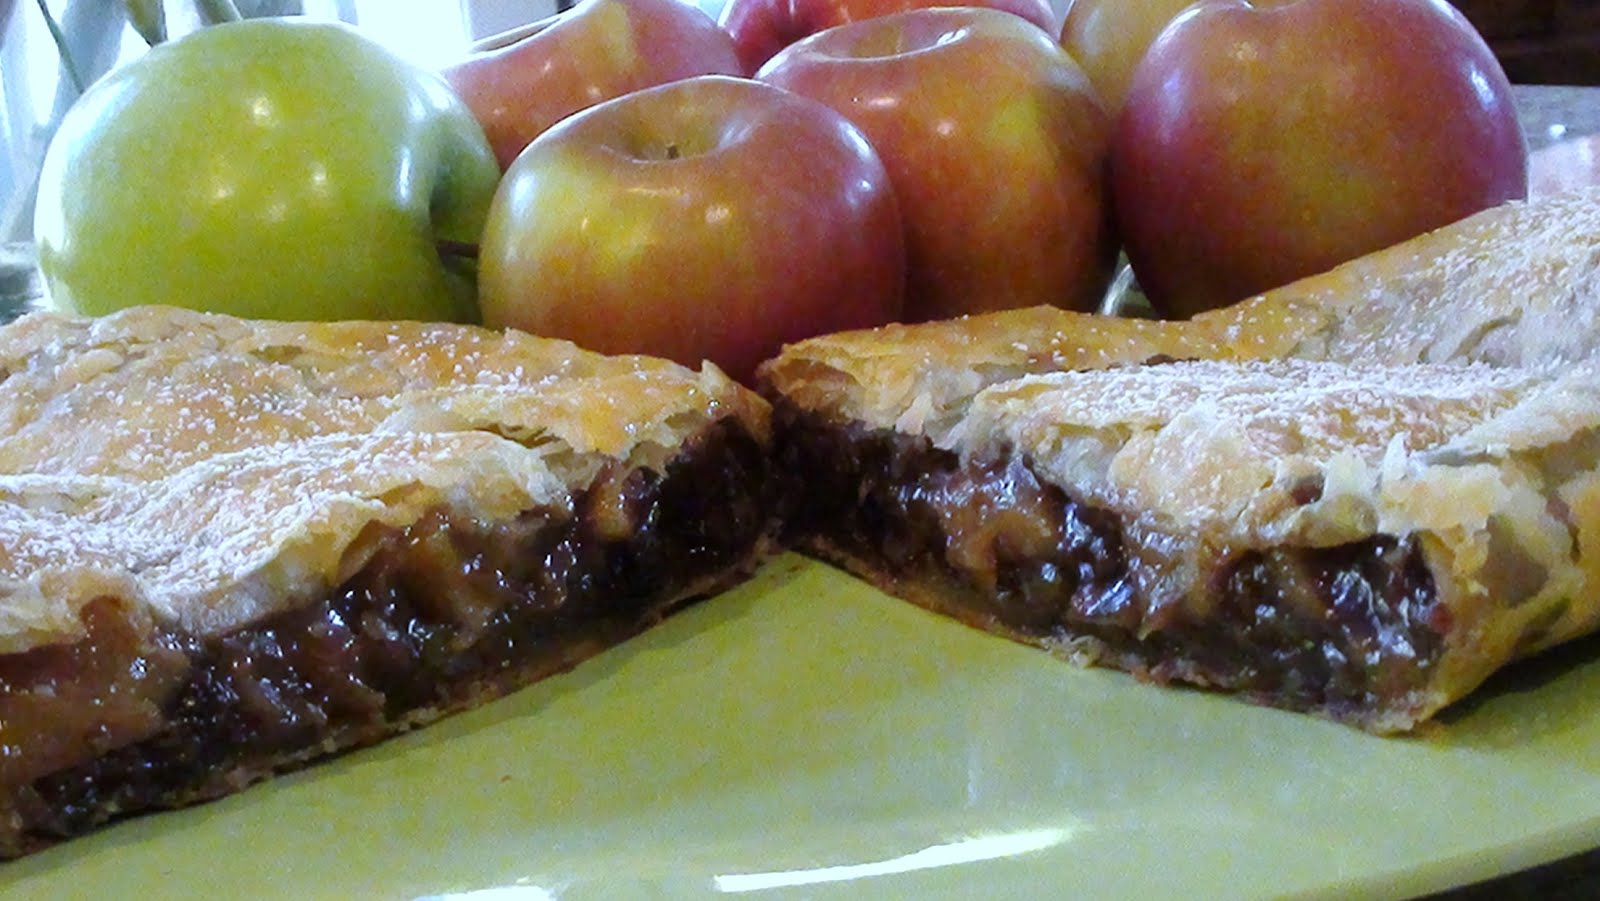
Apple Strudel from Rhonda's Saucy Adventures

Posted by - Rhonda

Apple filling adapted from Paula Dean, Pastry Puff Directions from puffpastry.com
I have always been afraid to make strudel, so I am glad this months challenge got me out of my comfort  zone.  I LOVE this recipe and will definitely make it again.
Apple Strudel:
1 egg
1 tbsp  water
1/4 cup golden raisins
17.3-ounce package Pepperidge Farm® Puff Pastry Sheets (1 sheet), thawed
1 Fuji apple
2 Granny Smith apples, peeled, cored, halved, and thinly sliced
1/2 lemon, juiced
1 tablespoon lemon zest
1 teaspoon ground cinnamon, plus more for sprinkling
1/2 cup brown sugar, packed
1 Tablespoon flour
1/2 cup vanilla wafers
 1/4 cup chopped pecans
  Glaze:
2 cups confectioners' sugar
3 1/2 tablespoons milk
Directions
Preheat the oven to 350 degrees F. Line a baking sheet with parchment paper. Combine the raisins, apples, flour, lemon juice, lemon zest, cinnamon, brown sugar, cookie crumbs, and pecans, in a 3 qt pan. Cook on low for 15 minutes, stir occasionally. 1.Remove pastry puff from the box, unfold the pastry sheet on the work surface. Roll the pastry sheet into a 16 x 12-inch rectangle. With the short side facing you, spoon the apple mixture onto the bottom half of the pastry sheet to within 1 inch of the edge. Roll up like a jelly roll. Place seam-side down onto a baking sheet. Tuck the ends under to seal. Brush the pastry with the egg mixture. Cut several slits in the top of the pastry. 2.Bake for 35 minutes or until the pastry is golden brown. Let the pastry cool on the baking sheet on a wire rack for 20 minutes. Sprinkle with the confectioners' sugar, if desired. 3.Drizzle Caramel Ice cream sauce if desired. For the Glaze: Mix ingredients thoroughly. *Cook's Note: If too thick add a little bit of milk. If too thin add a little bit of confectioners' sugar.

Saturday, December 1, 2012

December Challenge: Strudel

Posted by - Rena

Happy December! Hope everyone is having a wonderful holiday season so far.

This month's challenge is to make strudel. You can make whatever kind you like. Strudel is typically a layered pastry with a sweet filling inside but you can go the savory route if you prefer. Since everyone is busy with the holidays, strudel seems perfect. The possibilities are endless for fillings so go crazy!

I wish you all a wonderful holiday and I'll see you next year! 

photo from MarthaStewart.com

Thursday, November 29, 2012

Chocolate Cherry Chunky Blondies

Posted by - Dorrie

The Have the Cake theme this month is brownies, and while I'm all about chocolate and brownies, sometimes, like I like my men, I like a good blondie...
Mike and Henry in the car
The blondies that I really love...
Dorie Greenspan's book "Baking: From my home to yours" has a lovely recipe for "Chewy, Chunky Blondies" that I adore.  Dorie's recipe includes practically everything in the pantry: chocolate chips, butterscotch chips, walnuts and coconut.  I've made it this way before (substituting pecans for the walnuts) and they are great, but I've also simplified this time, and added only dark chocolate chunks and dried cherries.  Yum!

Chocolate Cherry Chunky Blondies

2 cups all-purpose flour
3/4 teaspoon baking powder
1/2 teaspoon baking soda
1/2 teaspoon salt
2 sticks (8 ounces) unsalted butter, softened to room temperature
1 1/2 cups packed light brown sugar
1/2 cup sugar
2 large eggs
1 teaspoon vanilla extract
6 ounces bittersweet chocolate chunks
1 cup dried cherries

(Dorie's original recipe has: 6 ounces bittersweet or semisweet chips/chunks, 1 cup butterscotch or Heath Toffee chips, 1 cup coarsely chopped walnuts, and 1 cup sweetened shredded coconut)

Preheat oven to 325 degrees and butter a 9-x-13 baking pan.  Place the buttered pan on a baking sheet.

Whisk together the flour, baking powder, baking soda and salt in a bowl.

In a stand mixer bowl or bowl with a hand mixer, beat the butter until smooth and creamy.  Add both sugars and beat until well incorporated.  Add each of the eggs separately, beating after each and then add the vanilla.  Add the dry ingredients until incorporated and then add the remaining ingredients, using a spatula to mix. Add the batter to the buttered pan and spread evenly.

Bake for about 40 minutes until the blondies are light brown, and pull away from the edge of the pan.  Cool in the pan before cutting and devouring, preferably with ice cream...
blondies

Thursday, November 22, 2012

Baker's Chocolate Brownies

Posted by -Rhonda's Saucy Adventures

Recipe adapted from Cooks
 I looked for a recipe that called for Baker's chocolate, because that is what I had in my cupboard when I decided to bake. I made the cake-like version of this recipe and I don't think I will do that again. I give this 2 stars but hope the fudgy version is better. I am going to keep this recipe and give the fudgy brownie a try, because so many people gave this recipe 5 stars.
4 sq. Baker's unsweetened chocolate
3/4 cup (1 1/2 sticks) butter
2 cup sugar
3 eggs
1 tsp. vanilla
1 cup flour
1 cup chopped nuts, optional
1/2 cup chopped oreo cookies optional

1. Preheat oven 350.
2. Microwave chocolate and butter in large microwave bowl at high 2 minutes or until butter is melted. Stir until chocolate is completely melted.
3. Stir sugar into chocolate. Mix in eggs and vanilla until well blended. Stir in flour and nuts. Spread in greased 13 x 9 inch pan. 4. Bake 30-35 minutes or until toothpick inserted in center comes out with fudgy crumbs. Cool in pan; cut into squares. Makes 24 fudgy brownies. Note: When using glass baking dish, bake at 325 degrees. For cake-like brownies, stir in 1/2 cup milk with eggs; use 1 1/2 cups flour.

Lemon Brownies

Posted by - bakingaddict


This is a really quick and simple recipe with lemons. I saw this on Me and My Sweets back in May this year and bookmarked it as I love lemon recipes. I made them in between packing so I couldn't find the right tin and used a foil takeaway container instead! It worked well though and although I didn't get a chance to try it, I was told it was delicious.


ready to go in the oven

lots of lemony glaze on top!

For the brownies
90g flour
150g golden caster sugar (I reduced it from the original amount so you may need to add more if you have a sweet tooth)
1/4 teaspoon salt
113g butter
2 eggs
2.5 teaspoon lemon zest (approximately 1.5 lemons)
2 tablespoons lemon juice

For the glaze
60g icing sugar
1 tablespoon lemon juice
2 teaspoon lemon zest (approximately 1/2 lemon)

  • Preheat oven to 180C.
  • Add flour, sugar, salt and softened butter to a bowl and beat until combined.
  • In a separate bowl, whisk together egg, lemon zest and lemon juice.
  • Pour into the flour mixture and beat until smooth and creamy.
  • Pour mixture into a suitable baking dish and bake for about 20-25 minutes, or until golden brown and a toothpick inserted into the center of the brownies comes out clean.
  • Allow to cool completely before glazing.
  • To make the glaze, mix all the ingredients together until smooth. You may want to add more lemon juice depending on the consistency required.
  • Spread glaze evenly on top of the brownies and add some lemon zest if desired.